Why Adding the Contact Form is Crucial
Some HTML templates don’t include presets with contact form. For example, Corporate Startup Landing Page Template.
Instead, there is a Campaign Monitor form (Newsletter) that allows you to configure the form to work with the Campaign Monitor service.
Nevertheless, the contact form functionality is included in all HTML templates that are available in the subscription, and today are going to describe the process of adding a contact form HTML code on a page and creating a custom preset with a contact form section.
We are going to talk about the following:
- Replacing the newsletter form with rd-contact form;
- Adding a preset with the contact form;
- Form activation;
- Adding some extra fields:
- Select;
- Radio;
- Checkboxes;
- reCAPTCHA and GDPR compliance.
1. Replacing the Newsletter Form with rd-contact form
Providing you did not find a contact form under presets:
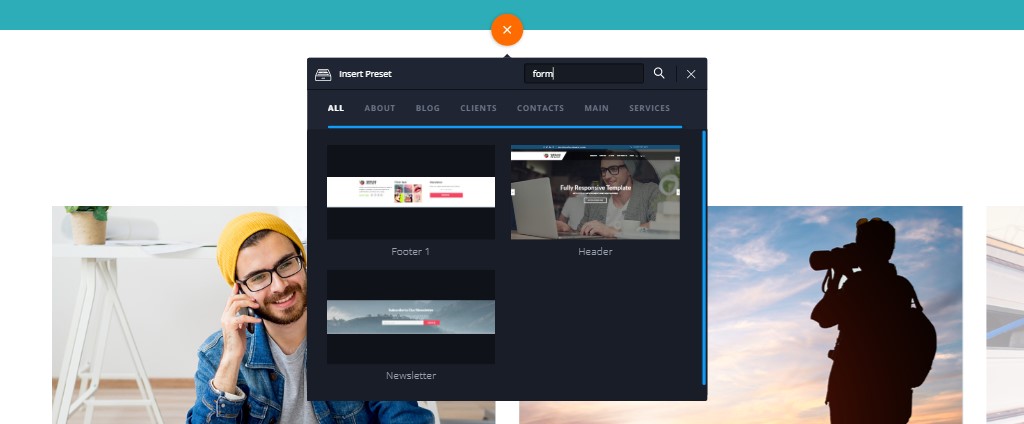
We are going to replace the newsletter form or any other section with an RD contact form.
Scroll down and find the newsletter form, usually, it is in the site footer. Switch to design mode (code mode) and select the section that needs to be replaced with a contact form:
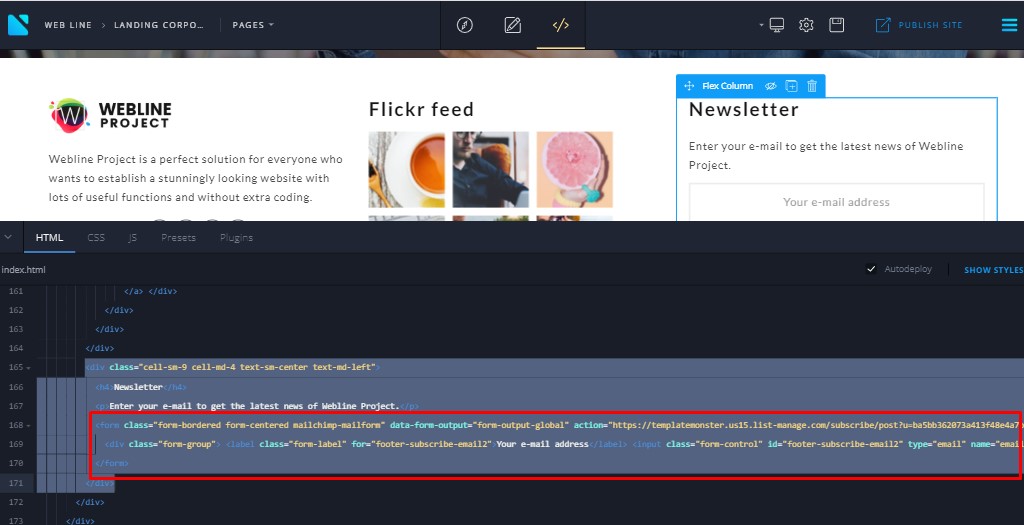
Remove the code from:
<form class=”….” to
</form>
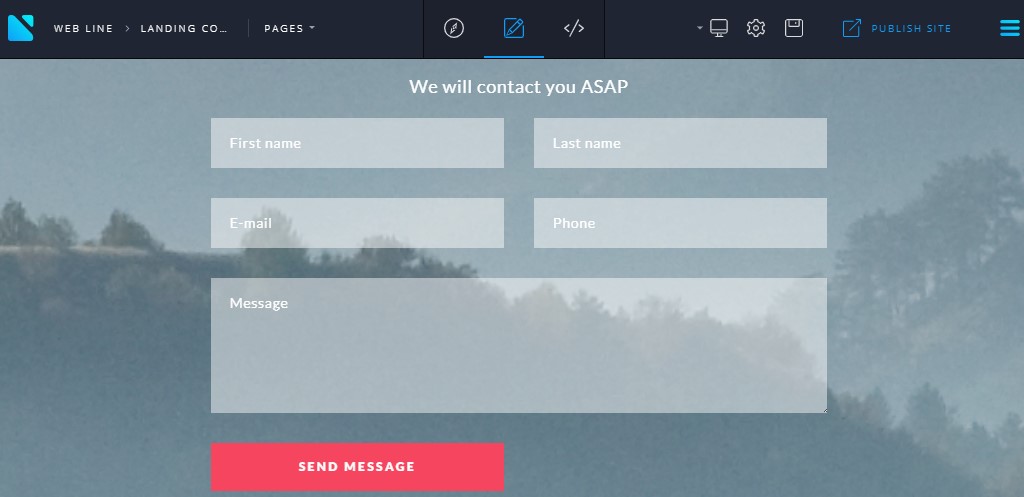
Replace it with the form code:
<form className="rd-mailform text-left" data-form-output="form-output-global" data-form-type="forms"
method="post" action="bat/rd-mailform.php">
<div className="row spacing-30">
<div className="col-sm-6">
<div className="form-group form-wrap-validation">
<label className="form-label" htmlFor="forms-name">First name</label>
<input className="form-control" id="forms-name" type="text" name="name" data-constraints="@Required">
</div>
</div>
<div className="col-sm-6">
<div className="form-group form-wrap-validation">
<label className="form-label" htmlFor="forms-last-name">Last name</label>
<input className="form-control" id="forms-last-name" type="text" name="last-name" data-constraints="@Required">
</div>
</div>
<div className="col-sm-6">
<div className="form-group form-wrap-validation">
<label className="form-label" htmlFor="forms-email">E-mail</label>
<input className="form-control" id="forms-email" type="email" name="email" data-constraints="@Email @Required">
</div>
</div>
<div className="col-sm-6">
<div className="form-group form-wrap-validation">
<label className="form-label" htmlFor="forms-phone">Phone</label>
<input className="form-control" id="forms-phone" type="text" name="phone" data-constraints="@Numeric @Required">
</div>
</div>
<div className="col-sm-12">
<div className="form-group form-wrap-validation">
<label className="form-label" htmlFor="forms-message">Message</label>
<textarea className="form-control" id="forms-message" name="message" data-constraints="@Required"></textarea>
</div>
</div>
<div className="col-sm-6 form-button">
<button className="btn btn-primary btn-block btn-effect-ujarak" type="submit">Send Message</button>
</div>
</div>
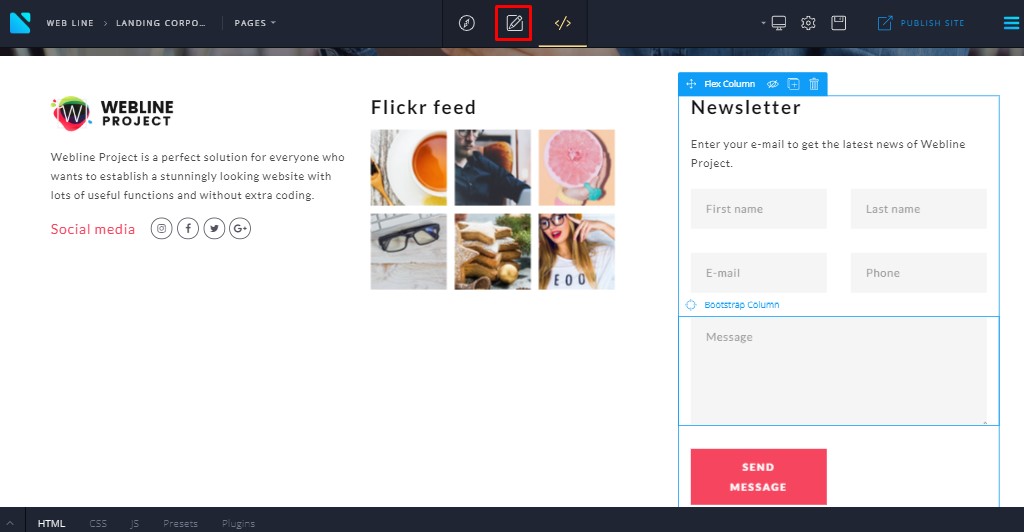
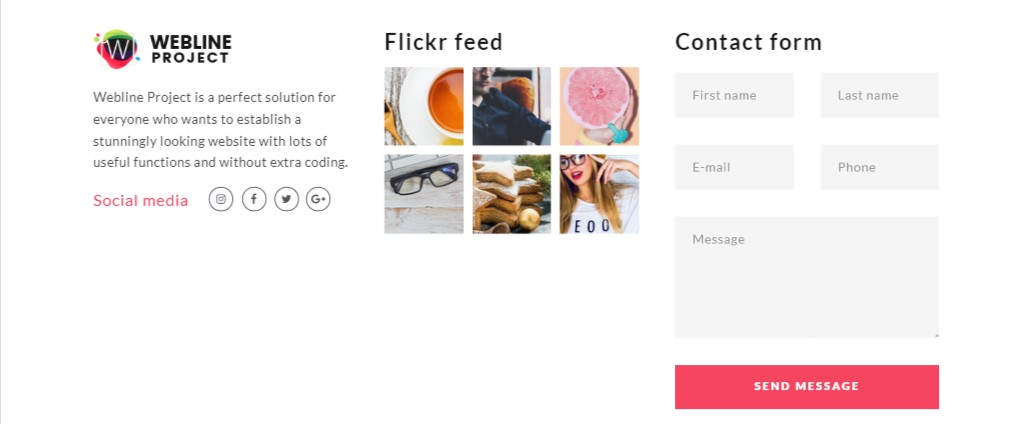
</form>Feel free to remove fields that you do not need.
Wait a few seconds and check a result:
2. Creating Your Own Preset with Contact Form
You can learn more about using presets here. Also, the detailed guide is included in the Novi Builder’s documentation. As an option, our experienced team can add more presets to your site with your desired design.
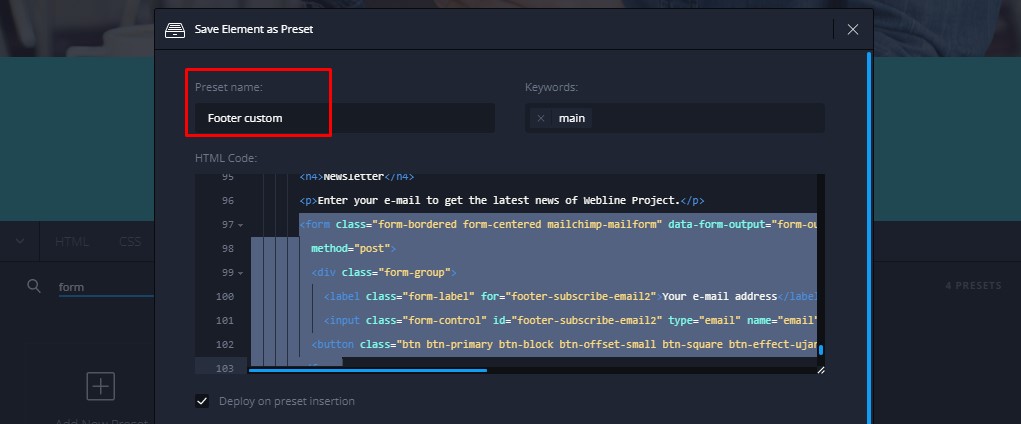
To save the section as a preset, please, select the section -> right click – create the preset:
Then switch to Edit Mode. The form should look like an example:
Let’s activate it.
Check the complete plugin documentation at the Novi Builder documentation – rd-mailform-plugin.
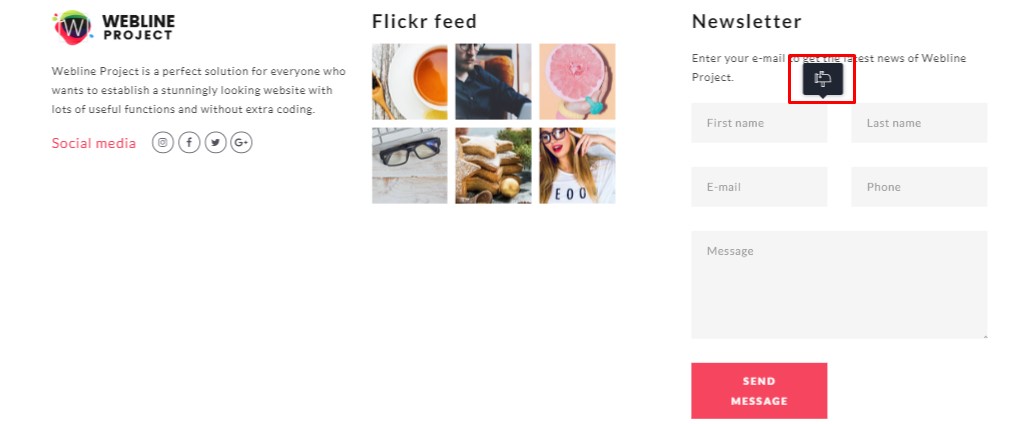
3. Contact Form Activation
Hover over the form until you see the following icon:
Open settings and add your own email address at the email field, select SMTP if you are using SMTP email on the server:
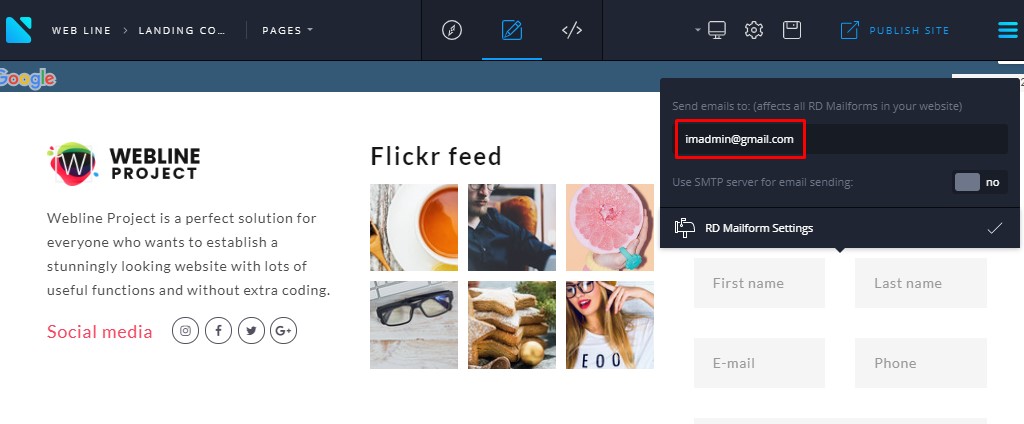
Save changes (checkbox at form settings) and then, save the project.
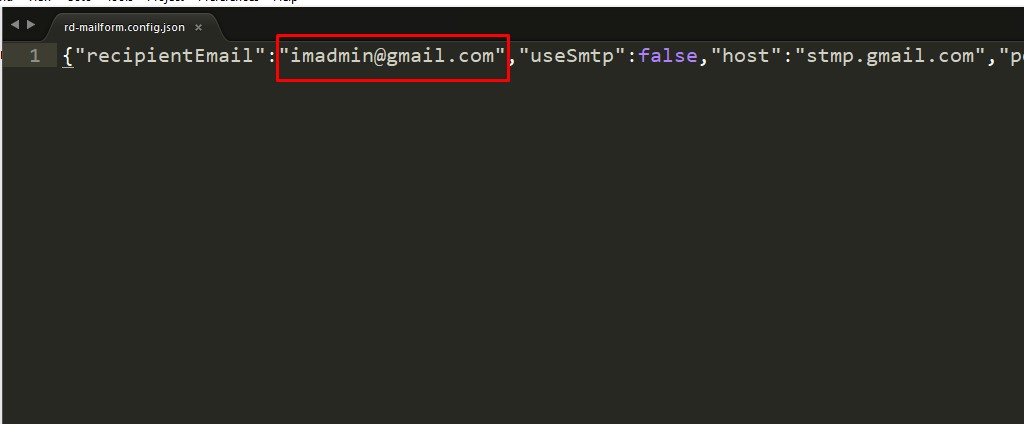
If you look at the rd-mailform.config.json file (the path is \Builder\projects\template\bat), you will find that the code became minified and the default email was replaced with your own. We do not recommend performing any changes in this file:
4. Adding Some Extra Fields
In this part, we are going to describe the process of adding some fields, such as select, radio buttons, and checkboxes.
The code provided previously shows how to insert the <textarea> input, input with type “text”, and input type “email”.
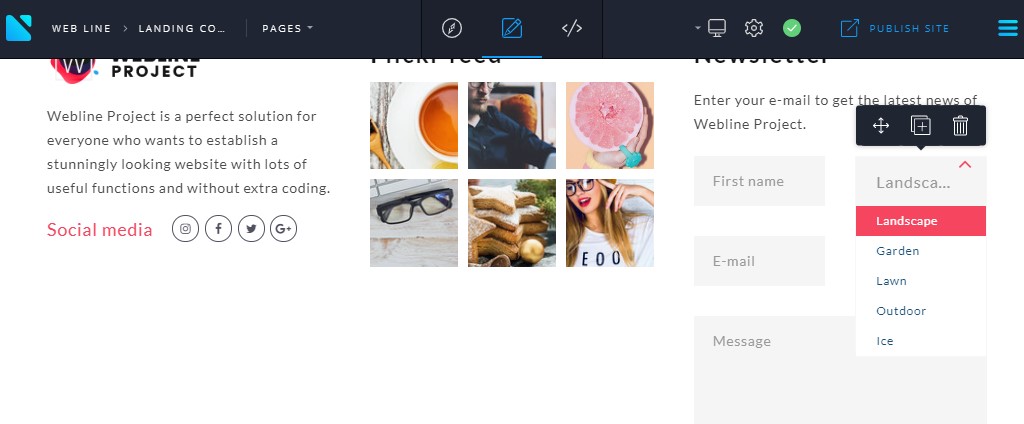
Let’s add a select tag to our form:
<div class="col-sm-6">
<div class="form-group form-wrap-validation">
<select id="garden-select" data-placeholder="Select a type" class="form-control select-filter" name="garden" data-constraints="@Required">
<option value="Landscape">Landscape</option>
<option value="Garden">Garden </option>
<option value="Lawn">Lawn </option>
<option value="Outdoor">Outdoor </option>
<option value="Ice">Ice </option>
</select>
</div>
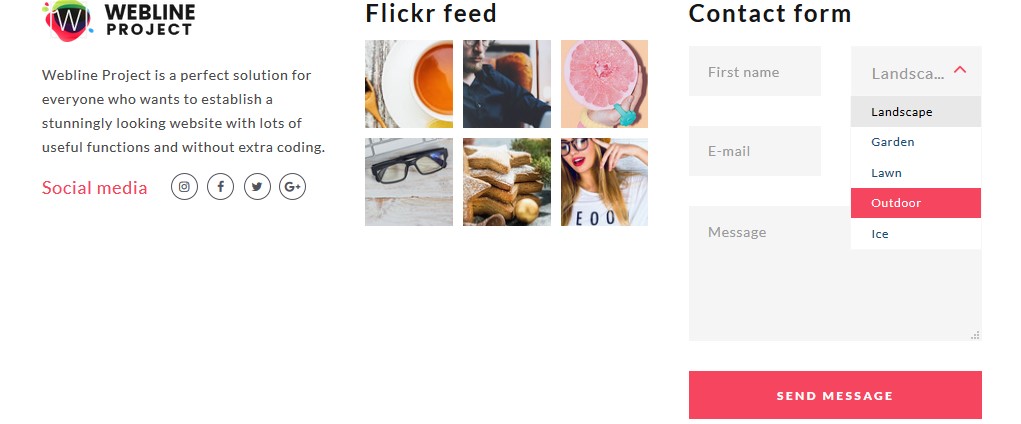
</div>The result will be the following:
In some cases, you will need to change colors or width to match with the entire style of your site. Feel free to add your own CSS rules in the design mode, CSS tab css/style.css file.
As an option, you may get the Extended support plan that includes expert help on changing the form styles.
Publish the project and check the result on your site:
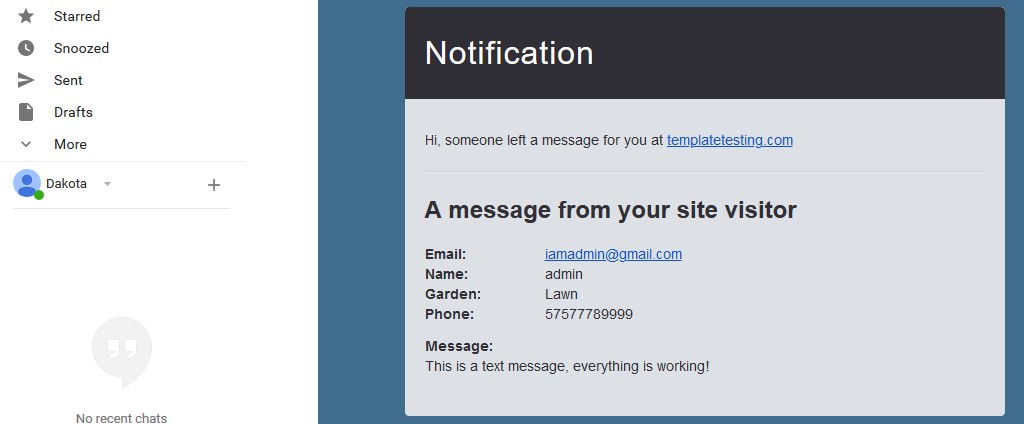
Create a test message and check the inbox. All fields should be sent:
If there any fields are missing, please ensure that all your fields have an “id” property, for example, id=”forms-phone”. Please note, that every “id” value should be unique on your site. Also, ensure that all fields have a “name” data attribute.
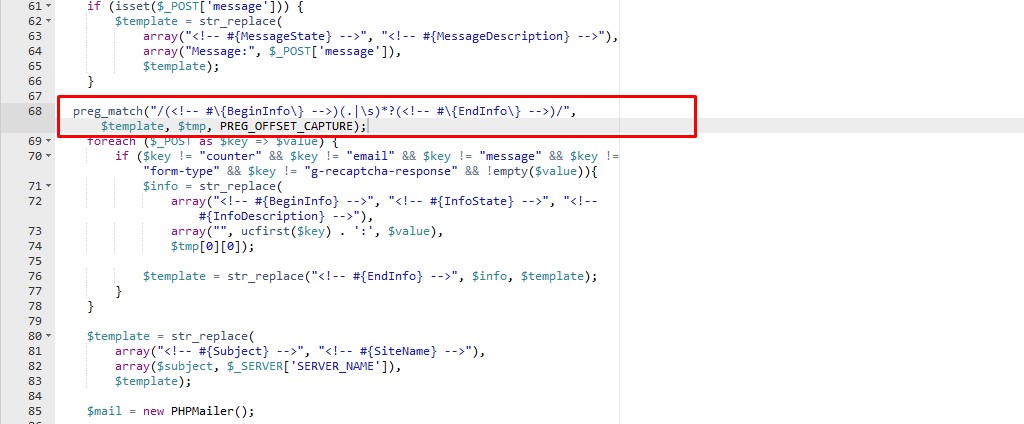
If the problem persists, please open \Builder\projects\template\bat folder, find rd-mailform.php and open in any code editor.
Find the line:
preg_match("/(<!-- #{BeginInfo} -->)(.|\n)+(<!-- #{EndInfo} -->)/", $template, $tmp, PREG_OFFSET_CAPTURE);And replace it with:
preg_match("/(<!-- #\{BeginInfo\} -->)(.|\s)*?(<!-- #\{EndInfo\} -->)/", $template, $tmp, PREG_OFFSET_CAPTURE);The result should look like:
Adding Radio Buttons
Radio and checkbox field types can be useful if you want to get some specific info from your customers or visitors.
Let’s create a new form for this example:
Let’s add radio and checkbox fields:
A radio selection allows users to choose only 1 option. For example:
I prefer communication in
- English;
- French;
- Spanish.
Please note that names should be the same for radio buttons (one group).
The code example:
<div class="col-sm-12">
    <p class="big text-center">I prefer communication in:</p>
    <br>
    <div class="form-group form-wrap-validation">
        <div class="radio-inline col-sm-3 text-white">
            <input type="radio" class="form-control" id="english" name="language" value="english">
            <label for="english">English</label>
        </div>
        <div class="radio-inline col-sm-3 text-white">
            <input type="radio" class="form-control" id="french" name="language" value="french">
            <label for="female">French</label>
        </div>
        <div class="radio-inline col-sm-3 text-white">
            <input type="radio" id="spanish" name="language" value="spanish">
            <label for="other">Spanish</label>
        </div>
    </div>
</div>
And we can use checkboxes for multiple selections:
The example:
I need:
Kitchen, washing machine, conditioner, hairdryer.
Checkbox Fields
Let’s add checkboxes, for example, hotel amenities: washing machine, conditioner, hairdryer, towels, dining.
Please note that names should be different for checkboxes.
<div class="col-sm-12">
    <p class="big text-center">I need (amenities):</p>
    <br>
    <div class="form-group form-wrap-validation">
        <div class="checkbox-inline col-sm-2 text-white">
            <input type="checkbox" class="form-control" id="towels" name="amenities-a" value="towels">
            <label for="towels">Towels</label>
        </div>
        <div class="checkbox-inline col-sm-2 text-white">
            <input type="checkbox" class="form-control" id="hairdryer" name="amenities2-b" value="hairdryer">
            <label for="hairdryer">Hairdryer</label>
        </div>
        <div class="checkbox-inline col-sm-2 text-white">
            <input type="checkbox" class="form-control" id="conditioner" name="amenities-c" value="conditioner">
            <label for="conditioner">Conditioner</label>
        </div>
        <div class="checkbox-inline col-sm-2 text-white">
            <input type="checkbox" class="form-control" id="parking" name="amenities-d" value="parking">
            <label for="parking">Parking</label>
        </div>
    </div>
</div>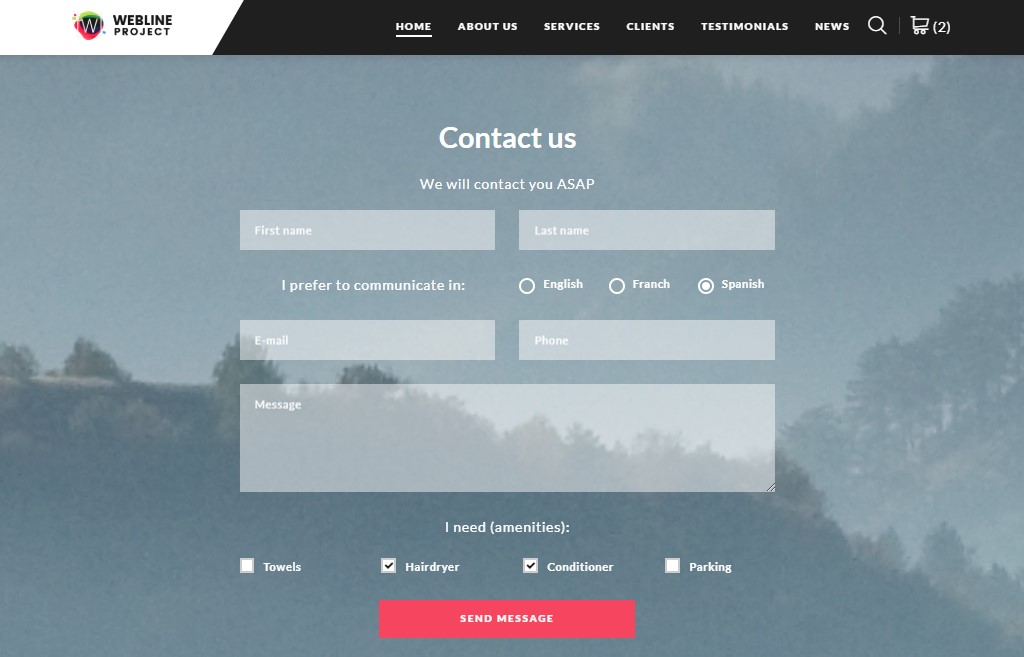
Full code:
<h3>Contact us</h3>
<p class="big text-width-smaller">We will contact you ASAP</p>
<!--form start-->
<form class="rd-mailform text-left" data-form-output="form-output-global" data-form-type="forms" method="post" action="bat/rd-mailform.php">
<div class="row spacing-30">
<div class="col-sm-6">
<div class="form-group form-wrap-validation"><label class="form-label" for="forms-name">First name</label><input class="form-control" id="forms-name" type="text" name="name" data-constraints="@Required"></div>
</div>
<div class="col-sm-6">
<div class="form-group form-wrap-validation"><label class="form-label" for="forms-last-name">Last name</label><input class="form-control" id="forms-last-name" type="text" name="last-name" data-constraints="@Required"></div>
</div>
<div class="col-sm-12">
<!--start of radio buttons-->
<div class="col-sm-6">
<p class="big text-center">I prefer to communicate in:</p>
</div>
<div class="form-group form-wrap-validation col-sm-6">
<div class="radio-inline col-sm-4 text-white"><input type="radio" class="form-control" id="english" name="language" value="english"><label for="english">English</label></div>
<div class="radio-inline col-sm-4 text-white"><input type="radio" class="form-control" id="franch" name="language" value="franch"><label for="franch">French</label></div>
<div class="radio-inline col-sm-3 text-white"><input type="radio" class="form-control" id="spanish" name="language" value="spanish"><label for="spanish">Spanish</label></div>
</div>
</div>
<!-- radio buttons end -->
<div class="col-sm-6">
<div class="form-group form-wrap-validation"><label class="form-label" for="forms-email">E-mail</label><input class="form-control" id="forms-email" type="email" name="email" data-constraints="@Email @Required"></div>
</div>
<div class="col-sm-6">
<div class="form-group form-wrap-validation"><label class="form-label" for="forms-phone">Phone</label><input class="form-control" id="forms-phone" type="text" name="phone" data-constraints="@Numeric @Required"></div>
</div>
<div class="col-sm-12">
<div class="form-group form-wrap-validation"><label class="form-label" for="forms-message">Message</label><textarea class="form-control" id="forms-message" name="message" data-constraints="@Required"></textarea></div>
</div>
<!--start of checkboxes-->
<div class="col-sm-12">
<p class="big text-center">I need (amenities):</p><br>
<div class="form-group form-wrap-validation">
<div class="checkbox-inline col-sm-3 text-white"><input type="checkbox" class="form-control" id="towels" name="amenities-a" value="towels"><label for="towels">Towels</label></div>
<div class="checkbox-inline col-sm-3 text-white"><input type="checkbox" class="form-control" id="hairdryer" name="amenities2-b" value="hairdryer"><label for="hairdryer">Hairdryer</label></div>
<div class="checkbox-inline col-sm-3 text-white"><input type="checkbox" class="form-control" id="conditioner" name="amenities-c" value="conditioner"><label for="conditioner">Conditioner</label></div>
<div class="checkbox-inline col-sm-2 text-white"><input type="checkbox" class="form-control" id="parking" name="amenities-d" value="parking"><label for="parking">Parking</label></div>
</div>
</div>
<!-- checkboxes end-->
<div class="col-sm-6 col-sm-offset-3 form-button "><button class="btn btn-primary btn-block btn-effect-ujarak center" type="submit">Send Message</button></div>
</div>
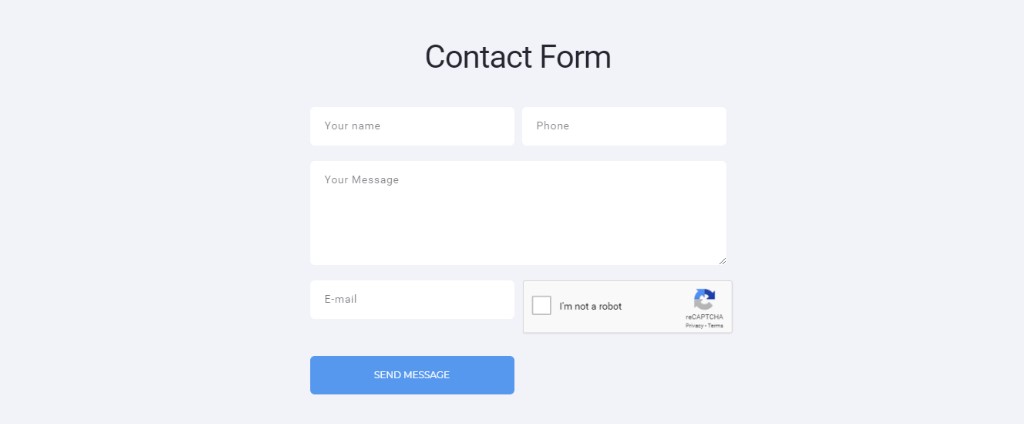
</form>reCAPTCHA Integration and HTML GDPR Compliance Service
Looking for a way to stop spammers and spambots programmed to attack websites from flooding your form? CAPTCHA is the tried-and-true way to stop it.
Take advantage of our expert HTML reCaptcha and Spam protection service.
Our HTML reCaptcha integration is valid for only one website template. We will add Captcha verification to up to 5 forms or presets.
As a bonus, our professionals will set up Captcha localization. Thus, it doesn’t matter what language your template uses.
Have you heard about New EU Privacy Rules (GDPR)? If you make a website for EU visitors you probably did.
HTML GDPR /DSGVO Compliance Service
Make your website HTML GDPR/DSGVO compliant with the help of professional service.
GDPR Suite – New EU Privacy Rules includes:
- Cookies policy page (with generic template) will be added to your template;
- Cookies usage banner that notifies website visitors about usage of cookies on your website;
- The privacy policy page (with sample content) will be added to your template;
- A notification of consent to the storage of data with a link to the privacy policy page and the checkbox in all built-in template forms;
- The proof of consent will be included in the emails sent via template forms, so you will have the evidence of consent.

Conclusion
Hopefully, now you have a better understanding of form creation, activation, and adding the most fields. Don’t forget that you can always turn to our support team for further explanations in the chat here.
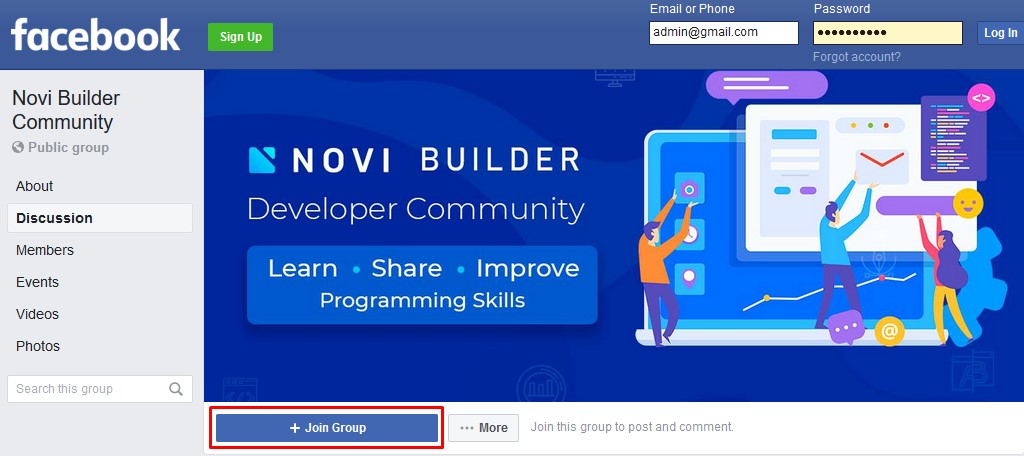
If you have any additional questions regarding the projects or templates, feel free to post them in the comments. Be sure to join our Novi Builder community on Facebook:
Having difficulties with some steps in the guide? Do not hesitate to get the Extended support plan that includes expert help. We will solve any issue just for $39.
If there are any advanced forms needed, feel free to join our support chat and check the price for additional customization and programming. We have got requests from used for adding file uploading fields, adding custom date-pickers, and other field customization. Our developers can implement some advanced customization for an additional fee.


online canadian pharmacies https://telegra.ph/Kak-vybrat-gazovyj-kotel-dlya-chastnogo-doma-02-14
Lovely material. With thanks.