Analytics Feature in the Latest Website Builder Update
The website builder update bringing you the latest version of Novi Builder is available now. There is a new section under Configuration called Analytics, the most expectable and important feature. Everyone knows that there is no point in a fancy website and lots of online activity without a carefully thought-out strategy. How can you develop a strategy without accurate and up-to-date analysis? This is where web analytics come in.
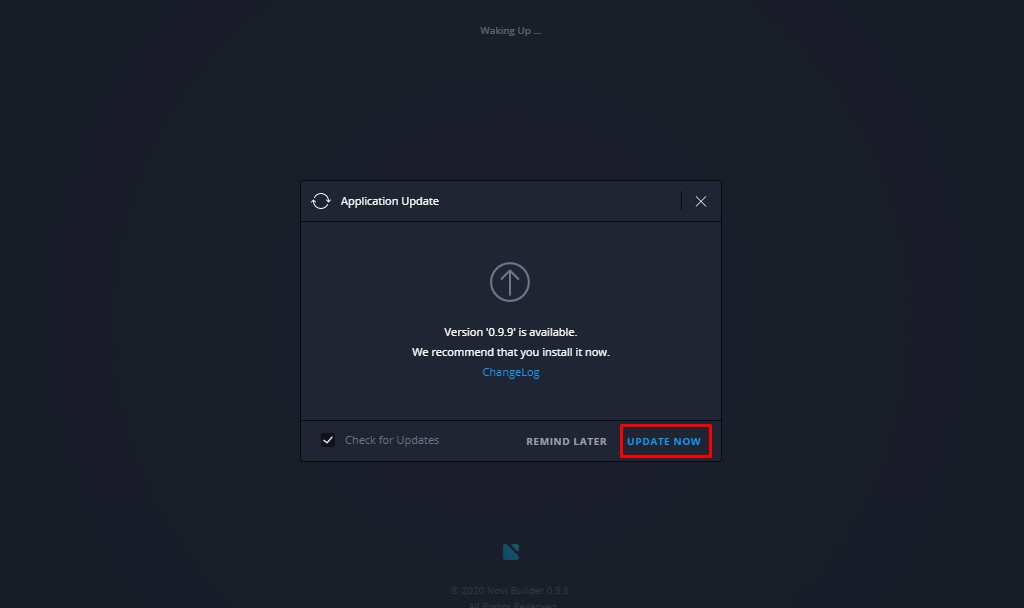
Usually, if there is an updated version available, you’ll get the pop-up window when you open the builder. Please click on the “Update now” button.
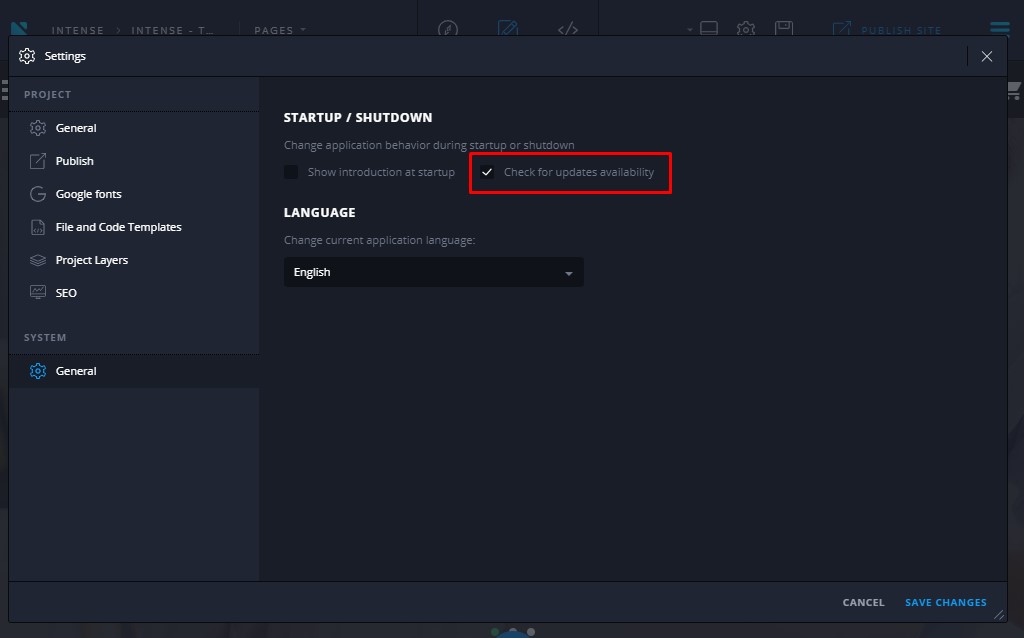
If you do not have an update notification, please navigate to Settings -> System -> General and enable the checkbox “Check for updates availability“:
Website Builder Update: Server Requirements
In most cases, the website builder update installs flawlessly but to ensure the comfortable work, please re-check your hosting settings, they should meet the following requirements. Please pay attention to the php_memory_limit parameter, it shouldn’t be lower than 64Mb. If there is no access to your hosting control panel, you can contact your hosting provider and ask to do it for you. By the way, if you are still looking for a reliable hosting solution with online support, feel free to turn to BlueHost, a leading web hosting solutions company. This hosting provider offers a variety of benefits that can greatly improve your experience of using the builder.
You may check additional information for Novi clients regarding the hosting service and sign up for the hosting account (special offer is available for Novi Builder’s blog visitors and readers).
The Importance of Website Analytics
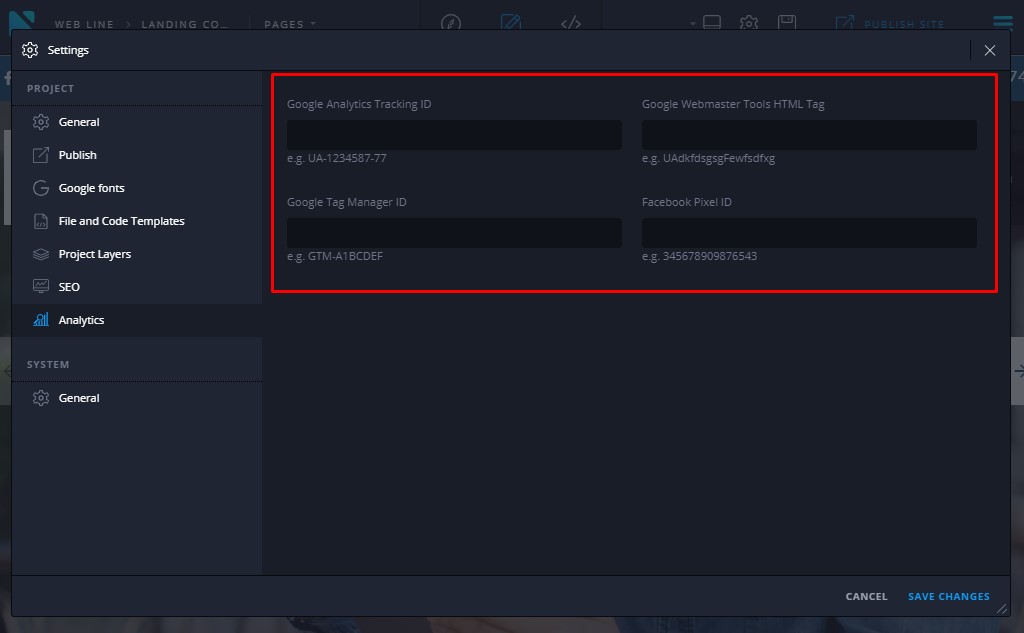
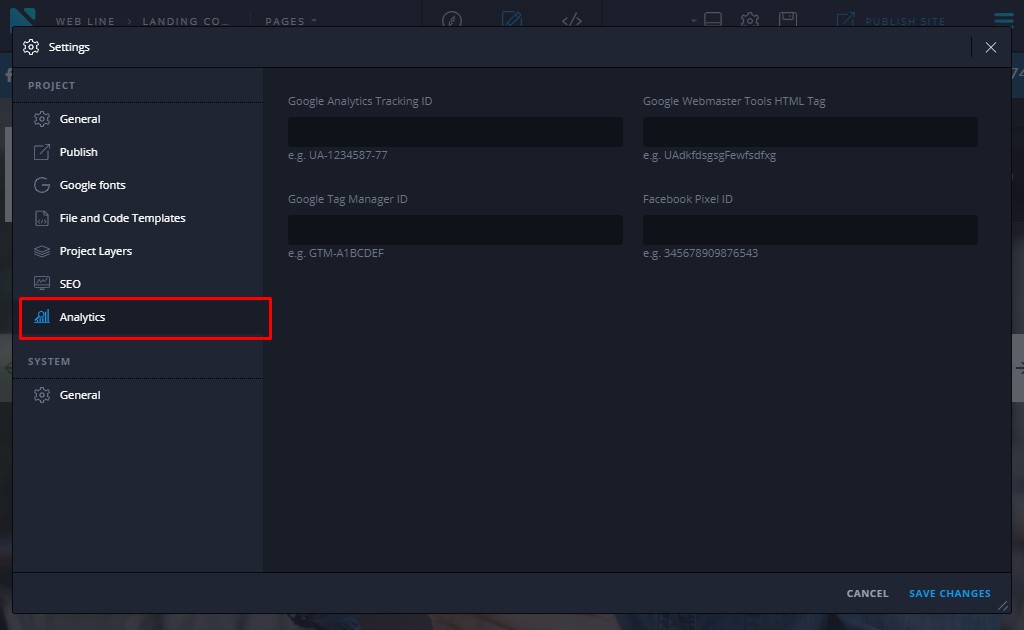
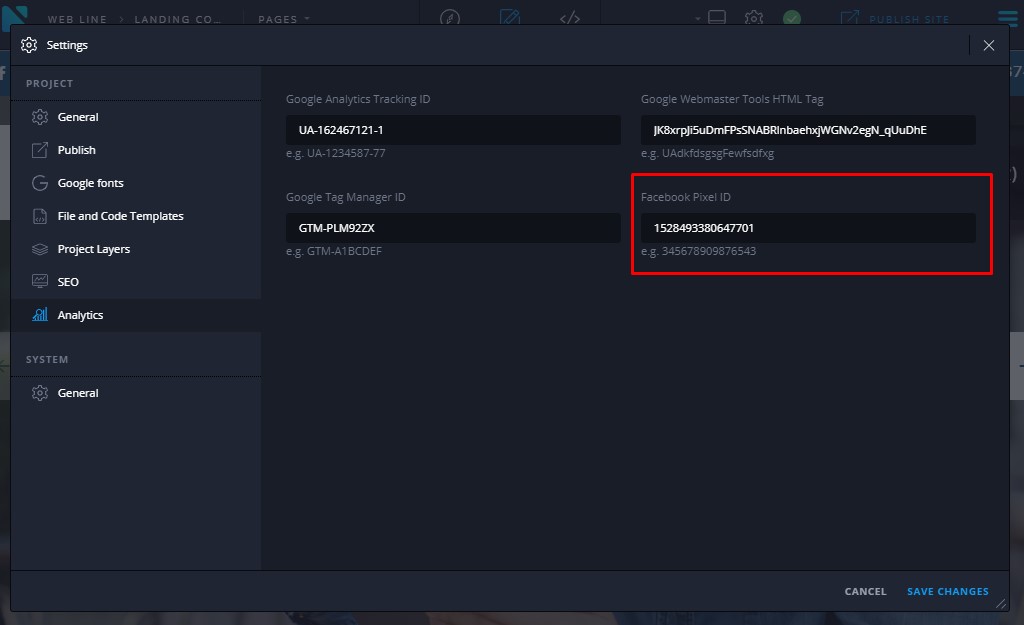
Measuring success is everything in business. It doesn’t matter what’s the aim of your website, just a blog or for your profit, observing your website traffic has great importance. It’s not a secret that higher positions in search engine results bring you more customers’ clicks. Just for your convenience, Novi Builder has got new shiny and neat fields for Google Analytics ID, Google Webmaster Tools, Google Tag Manager, and Facebook Pixel with a new update v. 0.9.9. You can find the new settings under Settings -> System ->Analytics tab after installing the website builder update:
There you can set up the following trackers:
In this guide, we will describe each parameter, its importance and the way of adding it in the Novi Builder’s updated interface.
Google Analytics
Basically, Google Analytics is a free web analytics tool offered by Google in order to help you analyze your website traffic. It’s a completely free service and provides valuable insights that can help you shape the success strategy of your business. To activate the ability to send lead-based events to your Google Analytics account, you’ll need to add your Google Analytics tracking ID in the first field. In order to get the ID, please follow these steps:
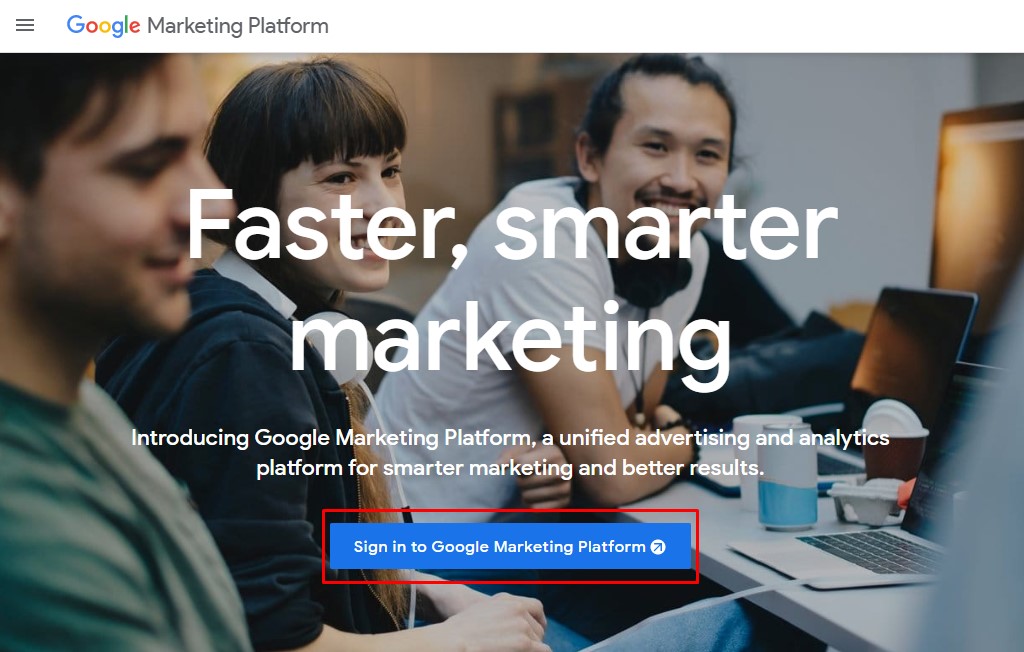
- Navigate to Google Analytics site;
- Click on Sign In button:
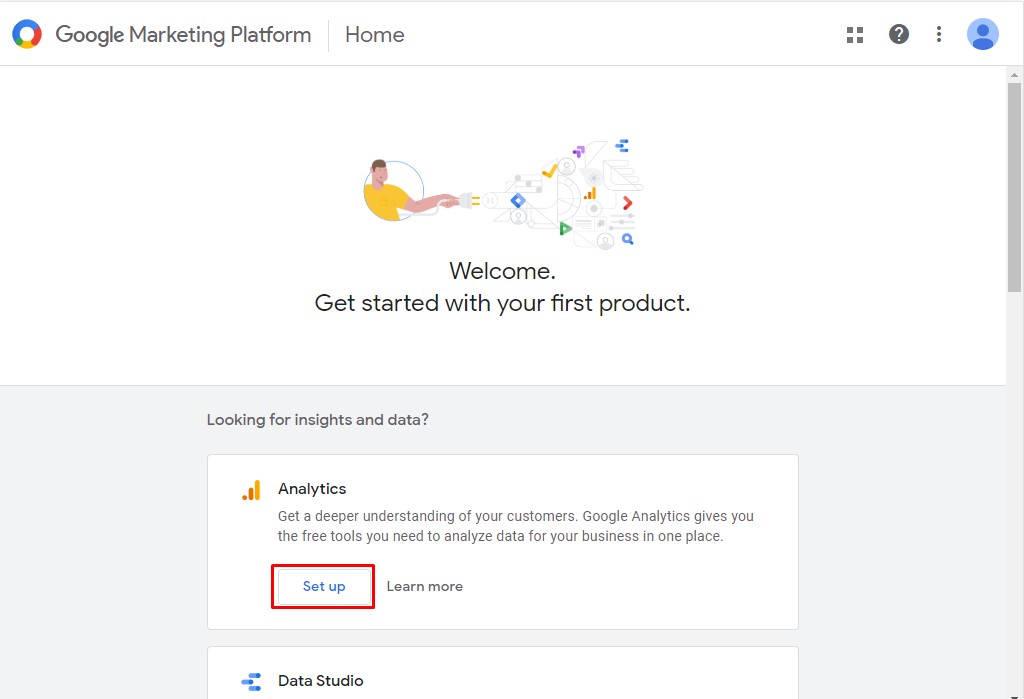
- Choose the option “Google Analytics”. Click on Set up and follow on-screen instructions in order to make your Property.
- You will see the Tracking ID when the Property is created. It will be specified on the page and appear in the JS code as well:
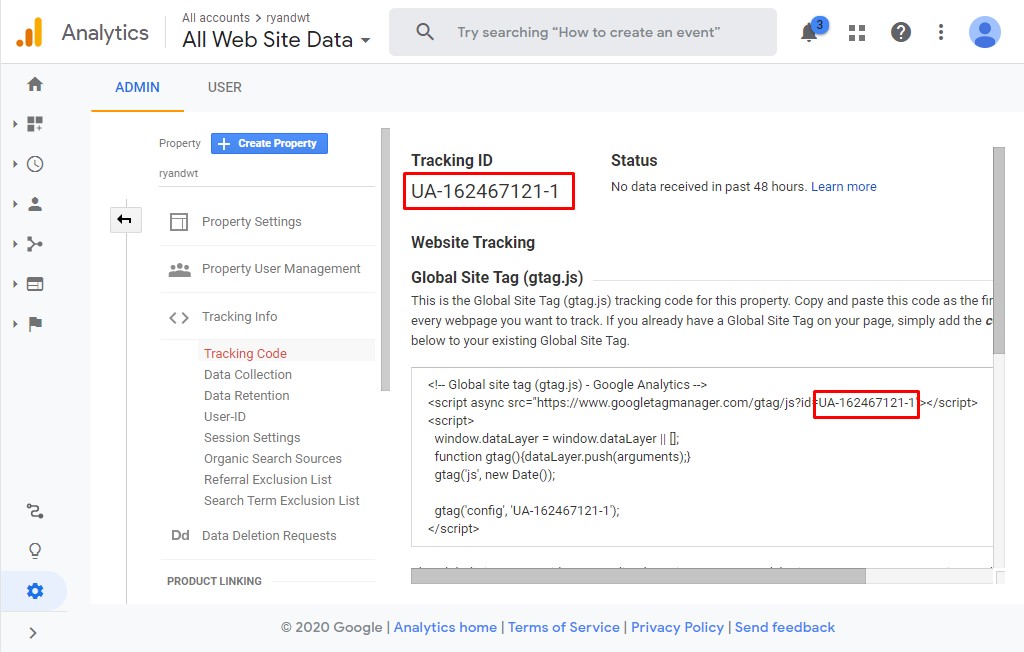
- You should click on the “Tracking Code” button. There you’ll find your Google Analytics ID. Just copy & paste it here:
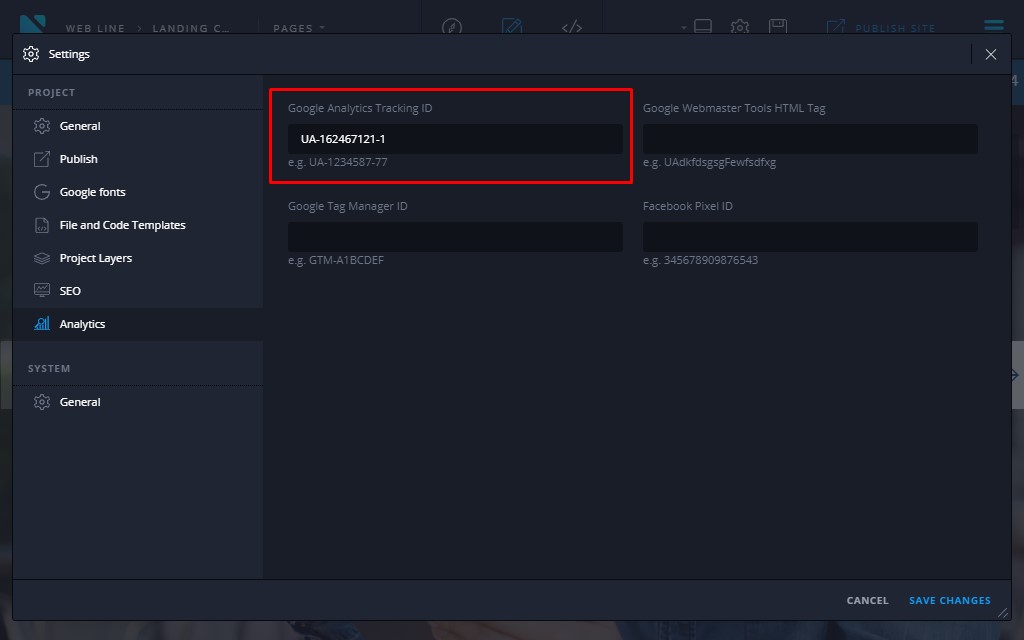
Once the code is added and the website is published, the data about your visitors and their actions on your website will start gathering.
Google Webmaster Tools HTML Tag
The main difference between Google Analytics and Google Webmaster Tools (GWT) is the object of reporting: Webmaster Tools reports on how search engines interact with your site, while Google Analytics reports on how website users interact with your site. Google Webmaster is also a free tool that helps you evaluate and maintain your website’s performance in search results thanks to the latest website builder update. With the help of the Google Webmaster Tools, you’ll get the following:
- the most popular queries causing your website to appear in search results;
- what queries are driving the most traffic;
- list of websites linking to yours.
Following these steps you can easily find the meta tag:
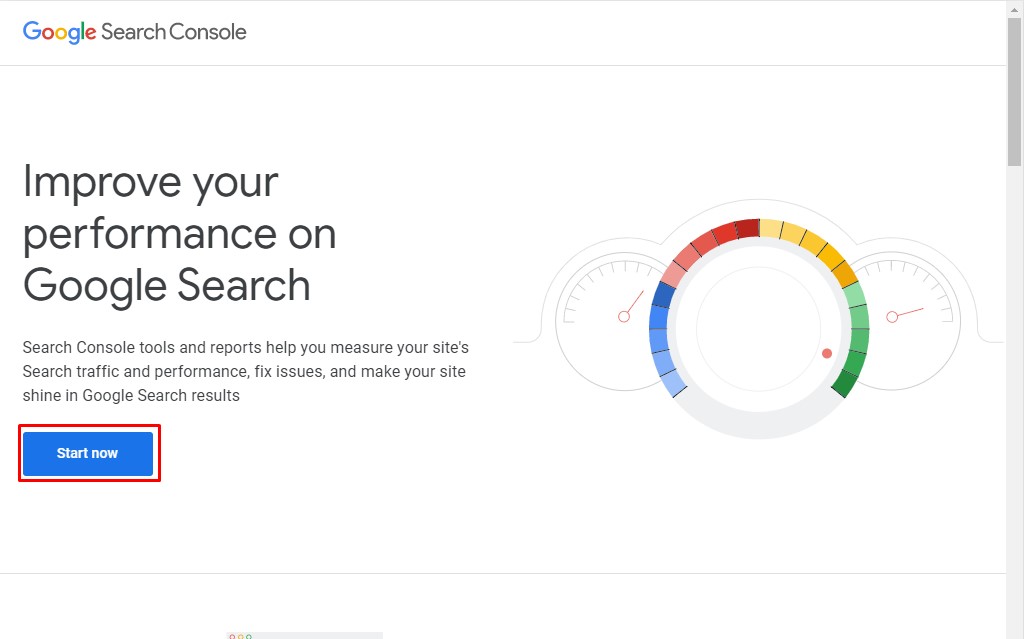
- Access the Google Search console. Click on Start now:
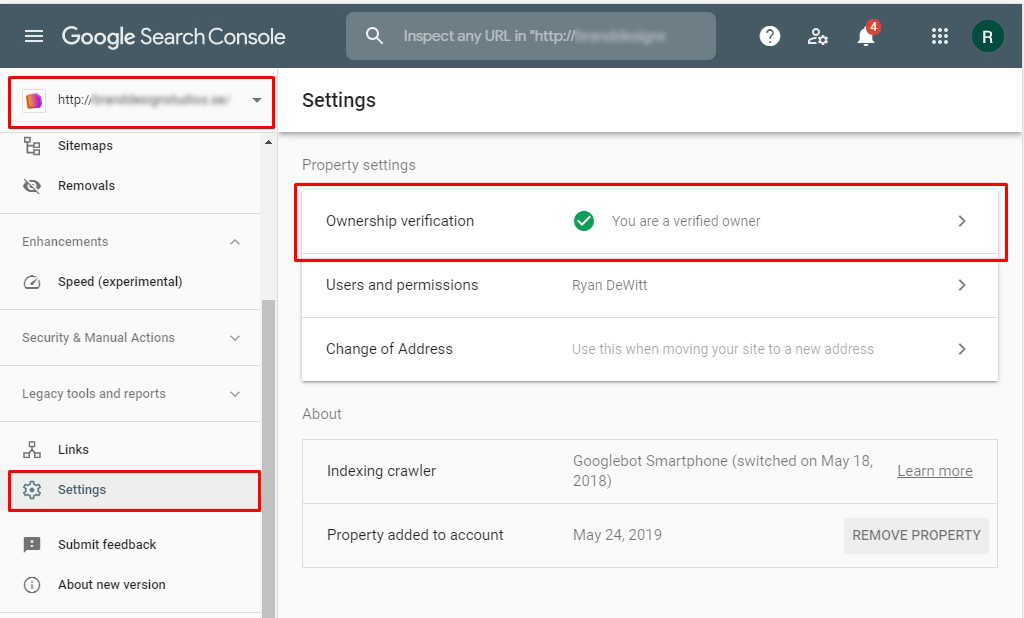
- You will access the Search Console if you have property. Otherwise, you will need to add a Property and Verify it according to the on-screen instructions. Make sure that you have selected the correct Property and click on Settings. Then click on Ownership Verification:
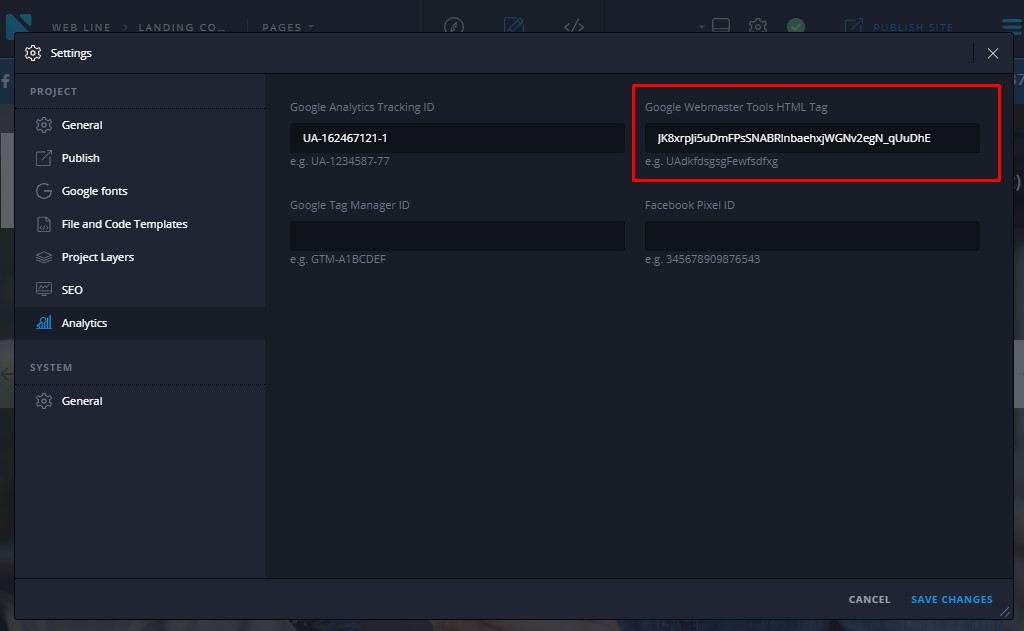
- Access the Additional verification methods section and click on the HTML tag. Copy the value in the box:

- Paste the code into Google Webmaster Tools HTML tag section:
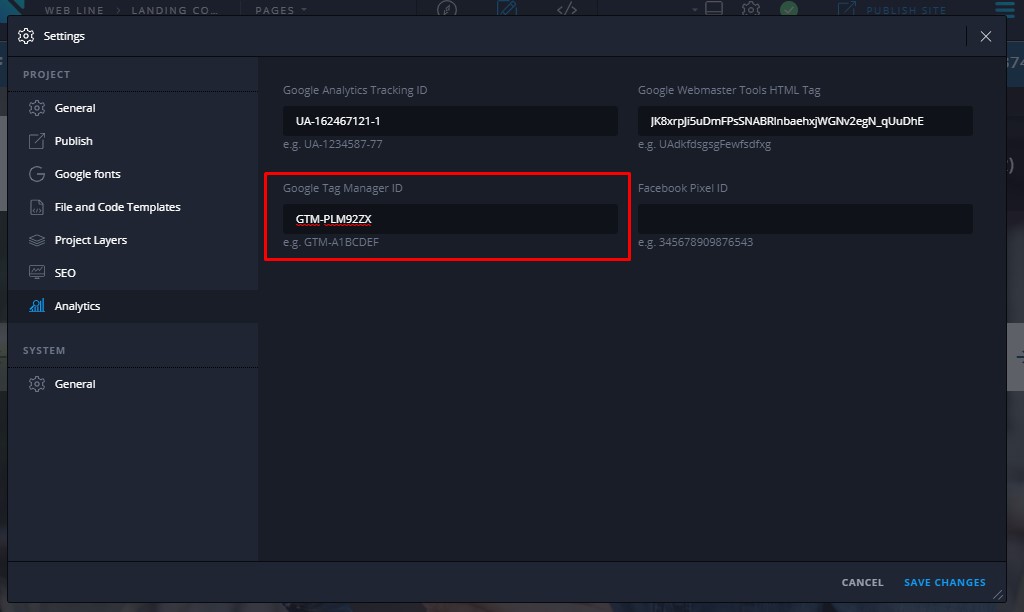
Google Tag Manager ID
The third tool available in Novi is the Google Tag Manager. It enables Tag Manager to fire tags by inserting gtm.js into the page. This is a free tool allowing you to deploy marketing tags on your website. Also, you don’t have to modify the code to use it. Here you can find a step-by-step guide explaining how to get the ID. With the release of the website builder update, no coding is required for its implementation. Just add it here:
Facebook Pixel ID
The Facebook pixel is the code that collects various useful data. It helps you track the conversions from Facebook ads and optimize them. With its help, you can build targeted audiences for future ads for your website visitors. Your Facebook pixel ID is located in the Ads Manager. Don’t have a Facebook Pixel set up? Please follow the guide to get started. In case you’ve done it already, the only steps you should perform are:
- Log in to Facebook and follow instructions.
- Create a Pixel and find your Facebook pixel ID in the code.
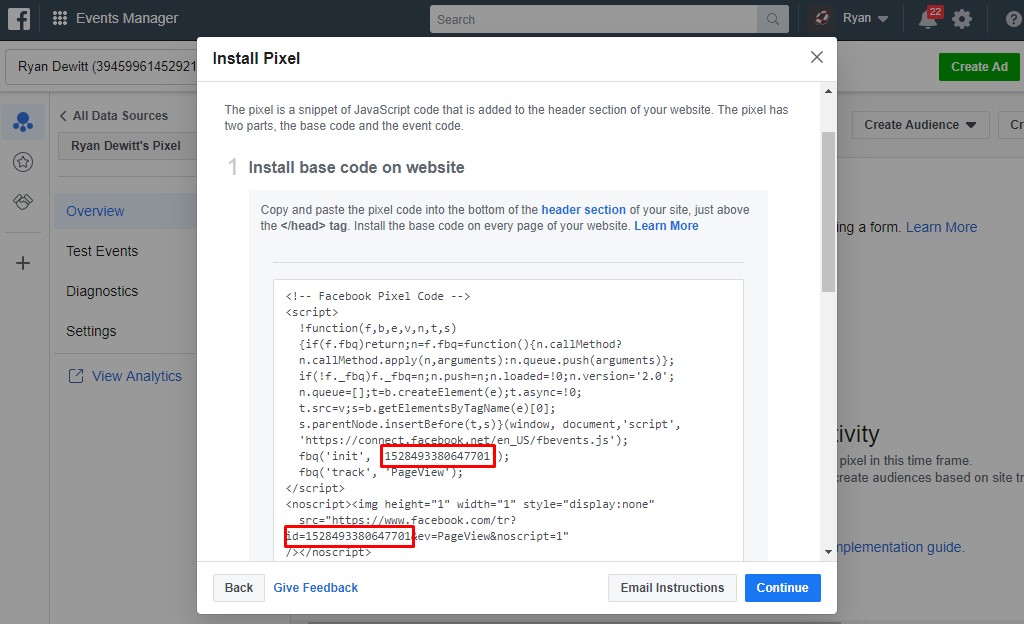
- Copy the code to any code editor. Copy your Pixel ID and paste it directly into the Analytics tab of the builder.
Check Analytics Features in the Website Builder Update
Don’t hesitate to try the updated builder and test its features. If you wish to get higher rankings in searches and draw traffic to your website, use our search engine optimization service. Our professionals will provide you with high-quality HTML SEO services that incorporate various aspects.
Novi builder’s update: Conclusion
Measuring is critical to your SEO success, client retention, and perceived value. It helps you “understand” your website. It’s better to spend your time and configure all the features. After that, you’ll be rewarded with higher rankings. To implement it easily on your website, the new website builder update was released.
Also, don’t forget that you can always contact our support team for further explanations by joining the chat here. Stay tuned to our blog as we are preparing new & useful guides for you. There are lots of ways that can make your work with it beneficial.
If you have any questions, feel free to post them in the comments. Be sure to join our Novi Builder’s community on Facebook. There you will find a lot of information regarding the builder and will be able to get assistance from the community. Also, don’t forget to visit the Novi Builder’s Facebook page where you can learn about our latest news and ask questions about our product.


Leave a Reply