Do you want to create your HTML website using the Novi builder, but don’t know how to start? Let’s review all the milestones of the website creation process and build a brand-new website from scratch together. Our ultimate guide on how to create HTML website step by step. Moreover, it will show you all the features of the Novi builder and how to use them correctly. Thus, let’s start our journey into the world of website creation with Novi builder.
New Project Start with Novi Visual Editor
After selecting a membership plan, you will get the ability to download the Novi website builder files. Thus, you will be able to run it on the localhost or your web server. To start discovering how to create HTML website step by step using the Novi editor, you will receive complete access to the creator. Explore the interface and get the ability to import a ready-to-use website template.
Depending on the membership plan, there are a different amount of website templates offered. To import a new website template, you need to Settings >> Import >> Import Template. The settings tab aligned to the right edge on the Novi builder toolbar at the top. After importing a template, a ready-to-use website with prebuilt content will appear in the website builder. Moreover, a large assortment of prebuilt blocks with content will appear as well.
Multipage Design by Novi
The process of figuring out how to create HTML website step by step is exciting and exciting. The website builder supports multipage website design templates. Furthermore, it offers the ability to manage pages and create new ones in one click. The page manager appears after clicking on the Pages button on the Novi toolkit at the top edge. It offers the opportunity to select a page for further HTML website creation. Alsom there is a filter bar available for quick searching.
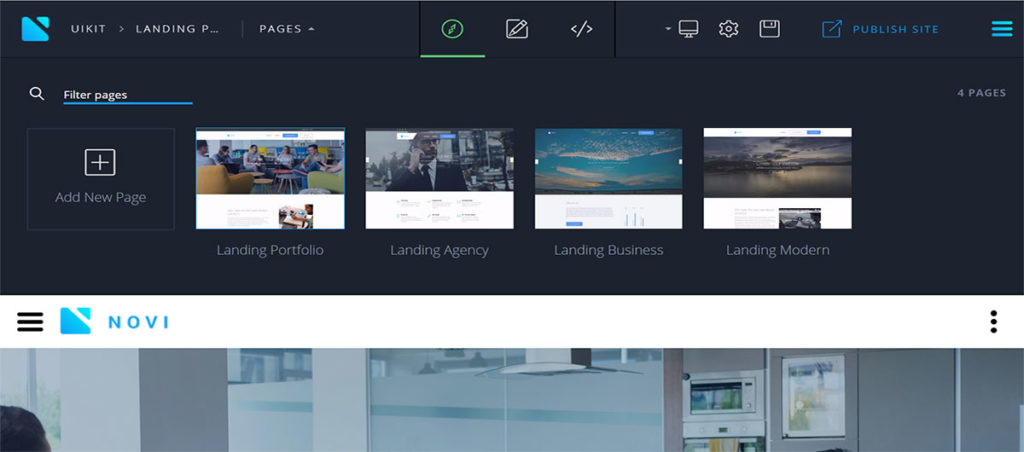
Moreover, the page manager foresees the option to create a new page, duplicate or delete an existing page. Right-click opens an additional menu in the composer. This menu brings the ability to rename a page, set it as home page, copy and remove it in one click.
New Page Creation
Do you want to know how to create HTML website step by step? For starters, you need to create a new page with a unique design. Click on the Add New Page button into the page manager and specify the page’s name into the appeared popup. After this, the system will automatically create a new page and add it to the site’s hierarchy.
Composing Default Block with Content
The Novi will builder will offer you the opportunity to select the first array with content. After this, you will have to option to supplement it with other content blocks. To convert a draft design into a complete web page, you need to arrange these sections in a particular order. Thus, there are no technical skills required to explore how to create HTML website step by step.
New Web Page Composing
At the bottom of the first bar with content located the Insert button. This button has a round layout with the plus icon inside. This button offers the opportunity to select the next array with ready-to-run content for your site. Hit the Insert button and browse the variety of containers in the popup appeared. There are lots of categories and a search bar available for quick navigation. After selecting a new segment, it will appear under the first container showing how to create HTML website step by step with no coding.
Further, the Insert button will appear at the bottom of each piece with content. Thus, you can continue building a new page by adding new blocks from the list of ready-to-use containers with content.
Page Settings Setup
Each web page has to have a particular pack of settings to work correctly on the Internet. The Novi builder foresees the ability to configure a page into the popup-ing menu. To open this menu, you need to click on the Settings button on the toolbar at the top edge. The page settings popup offers the opportunity to find out how to create HTML website step by step by setting up the first page and SEO setting for each web page.
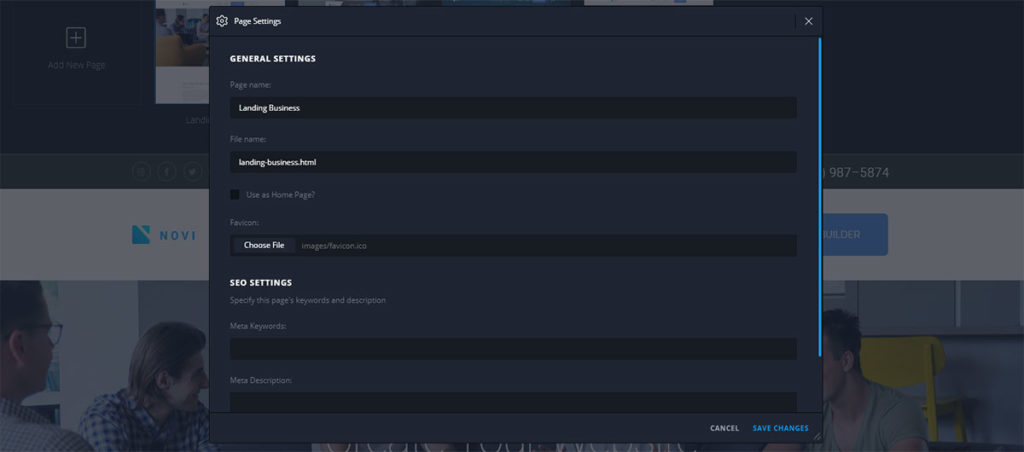
Page Name and File Path
For starting, you need to specify a page’s name into the corresponding input files. The system creates a separate HTML file to each web-page into the root directory. Thus, the page settings popup will display the path to the page’s data on your server. This field is fully editable, so you can easily update the direction to the page’s file. Also, you can change the file’s extension if required.
Do you want to learn more about how to create HTML website step by step? Keep reading our guide and become an expert website creator. The page settings popup allows you to set up a page as a Home page by selecting the appropriate checkbox. When the box is active, the file name changes to index.html. There will be no option to change it or update the publishing route.
Favicon Adding in Novi Builder
Personalize your web-page by adding a favicon. Favicon is a simple image with 16×16 or 32×32 pixels size that appears into the page’s tab, in a website browser. The primary purpose of using the favicon is enhancing the user experience in a browser. It avoids the necessity to read tabs names and helps users to navigate at browser tabs bar quickly. This article will help you to discover how to create HTML website step by step and set it up correctly.
To add a favicon for your page, you need to find an illustration that will briefly describe the page’s topic. After this, you need to convert it to a 16×16 or 32×32 pixel icon by using online image converters on the web. After turning the picture, you will get a file with the ICO extension. Then, you need to navigate to the page settings at the Novi builder and click on the Browse button under the Favicon section. After this, you will need to select the favicon file on your PC and hit the Submit button.
Primary SEO Settings
Are you ready to run your first website? Keep reading this article and discover how to create HTML website step by step with no coding. Please be informed that the page setting popup offers the opportunity to configure the foremost SEO settings for each page. The primary SEO settings imply the Meta keywords and Meta description segments. These settings will help you to improve a website’s ranking and configure a page’s snippet at web-search.
The Meta keywords field at page settings foresees the ability to briefly describe the page’s content and help Google crawl robots to index a web page correctly. The Meta description field provides the option to add an outline of the page’s content. Moreover, it allows showing the summarized information about the page at search results. A successfully created meta description with meta keywords will help improve a website’s ranking. Withal it will help you to get better search results for your site.


Content Personalization with Novi
After finishing a web page creation, by arranging prebuilt segments one-by-one, you need to know how to create HTML website step by step. Update the default content on the page in few clicks using the Novi composer. Thanks to the drag and drop functionality, you can easily add your content. To update a web page item, you need to select it and choose one of the available customization tools from the popup-ing toolbar.
Content Blocks Management
In case you want to substitute a particular part with content, just select it in the Novi builder and hit the Move Layer button. Holding this button, you can replace a pre-formed piece of content, only using a PC mouse in your hand. Moreover, the toolbox brings the opportunity to change a cover with a new one. Further, you can duplicate it, or remove a segment with content in one click. Additionally, the popup-ing editing menu includes extra setup options for a particular preshaped part for complete customization. Hence, only access to the Internet required to explore how to create HTML website step by step using the Novi builder.
Images Replacement in Novi Builder
Let’s start a website personalizing from the very beginning. For starting, we need to renew a default logo with a custom one. To change the logo, you need to select the default logo and redeem it with a new logo picture. Hit the Replace button in the popup-ing toolbar to change your logo. The procedure is equal for any other images in the Novi builder. Thus, you can easily personalize all photos on a default website template in a few clicks with the help of our ‘How to create HTML website step by step’ guide.

After clicking on this picture, the system will redirect you to the image library. The inbuilt functionality of the media library foresees the ability to upload new photos from the world’s excellent photo stock Unsplash and crop pictures directly into the admin panel with no coding. To navigate to the editor, you need to double-click it.
Default Texts Replacing
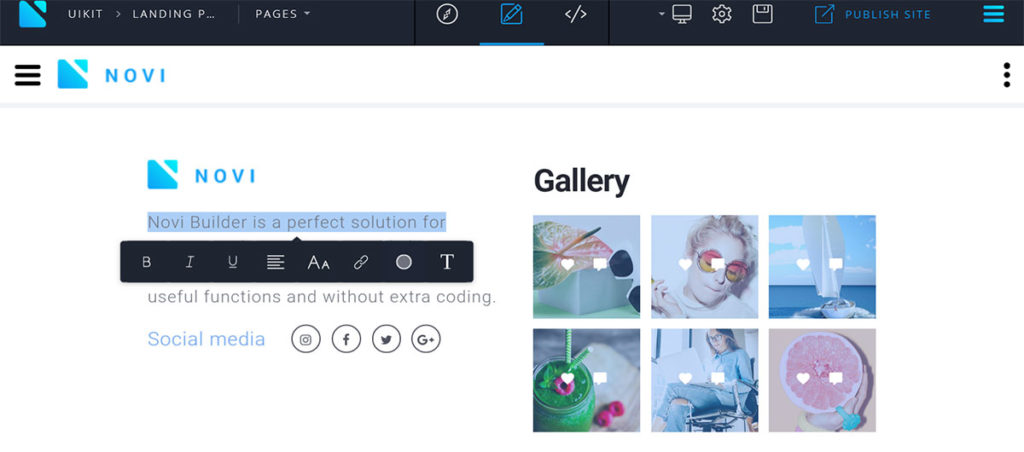
When the logo and other images are personalized, you need to update the default texts on a website and change their design according to your needs. The double click on any text opens the advanced text editor and provides the ability to re-type the default text. Additionally, you can easily select a text block to remove it and paste your writing with no effort. The system supports hotkeys, so there is no need to learn how to create HTML website step by step. The content updating process is quick and easy, thanks to the codeless interface of the Novi Builder.
Text Style Modification
The advanced text editor implies a large variety of text editing tools. It allows you to change a text writing style, configure its alignment, change a text case, and apply fonts by using the popup-ing toolkit. Moreover, the toolbar offers the opportunity to add a link and change the color of selected text. After clicking on the font change button, an advanced font manager menu opens. Using this menu, you can easily pick up a new font for a selected piece of text from a drop-down list. Hence, you can configure it according to all your needs. Also, you can update the font-weight, set up the custom font size, line height, and letter spacing.
After clicking on the connection update button, you will get the opportunity to examine how to create HTML website step by step. Add a hyperlink to a selected piece of text to lead clients on particular pages. The popup-ing menu foresees the ability to connect one of the website’s pages. Therefore, you can choose one of your favorite divisions, or specify a custom URL address. Also, you can set up your link to open a new page into a new tab by selecting the appropriate checkbox. The color update option brings the opportunity to specify an RGB color code, or pick up new color from the palette. Additionally, you can specify its opacity with no effort.
Background Update in Novi Builder
Make the design of your website unique by changing blocks’ cover images. The visual website creator provides the ability to update the back coating of each segment easily. To change a picture, you need to select a section and click on the Change button in the popup-ing menubar.
Additionally, the system offers the opportunity to use a pure color as a ground design for the pieces of content. In case you want to discover how to create HTML website step by step more thoroughly, try creating a gradient color. To set up a plain color backdrop, you need to pick up new color from the palette and click on the submit button. In case you want to make a block’s background gradient, navigate to the gradient tab into the color manager.
Sliding Gallery Setup
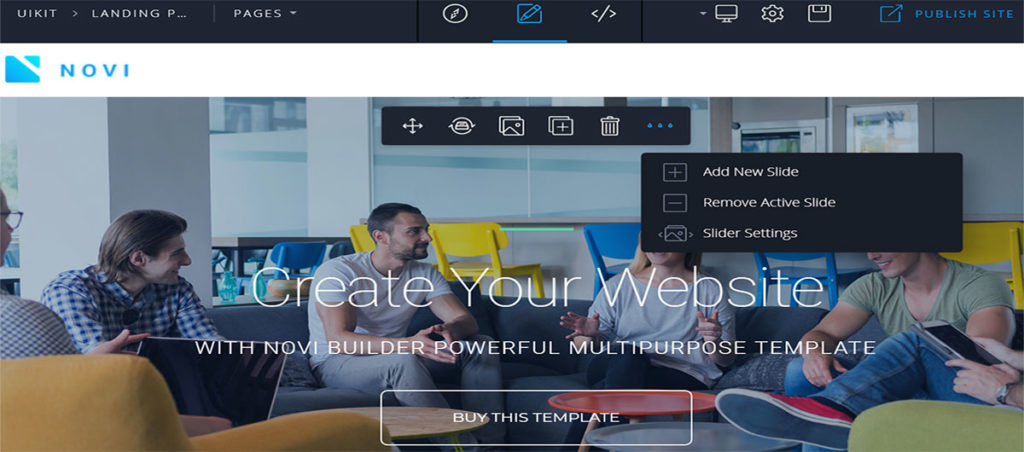
When a website is almost ready, you need to make the final adjustments by configuring galleries and social media icons on a website. The feature-rich admin panel brings the ability to set a sliding gallery with no coding. After selecting a gallery, the popup-ing toolbar will bring the option to add a new slide, remove an active side, and configure sliding options. Using the slider settings, adjust a set up a sliding gallery in a few clicks. For instance, you can pick up a transition effect, enable autoplay, and set up the slider autoplay delay option. Using the Novi builder, you don’t need to be a proficient tech specialist to figure out how to create HTML website step by step.
Google Map Configuration in Novi Builder
Add your location on a Google Map and share it on your site easily. Using the Novi website creator, you can easily add a Google Map API key, specify the map center and zoom options. To enhance the map’s design, you can select the map style from the drop-down list and update the default location pointers with the default ones. Discovering how to create an HTML website step by step more deeply, you will find out that the map’s functionality allows you to add an unlimited amount of location pointers on the map.
Containers with Prebuilt Designs
Each website template by Novi includes different parts with ready-to-run content. Thus, you can use them to build your website from scratch. However, if the assortment of the prebuilt layers doesn’t fill your need, the system offers the opportunity to create custom blocks with content. Do you want to know how to create HTML website step by step quickly? Use custom containers with personalized turnkey content and built a brand-new design by arranging ready-to-run sections in a particular order.
Custom Layer Creation
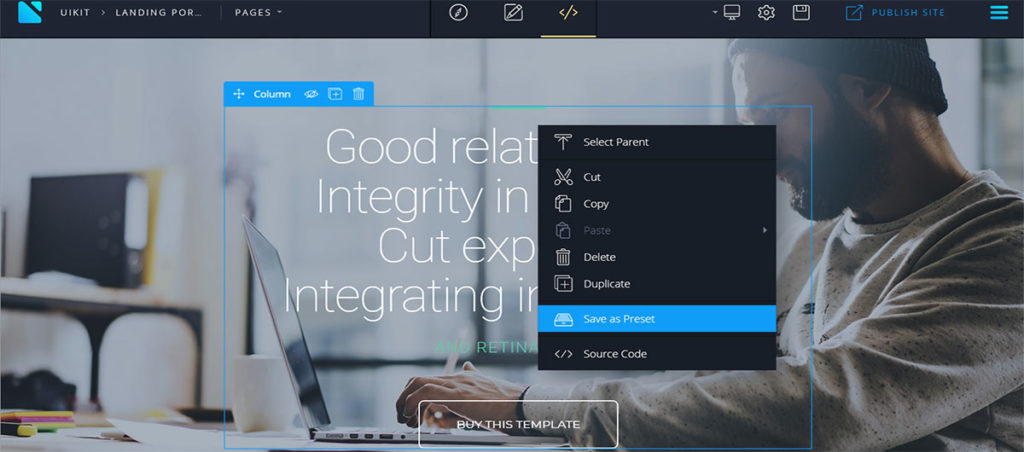
To create a custom overlay, you need to modify any piece of a website and fill it up with your content. Once the content is ready, you can create a new custom panel in a few clicks. To do this, you need to navigate to the Design mode in the Novi builder and select the modified segments with content. Then, you need to right-click on this block and select the Save as Preset item.
After this, the system will save this section and offer you the option to create a preset’s name. Additionally, you will have the opportunity to add keywords for quick finding the custom element. Then, you will have the ability to review the HTML coding of your block and save the preset. Please note, if the section includes any third-party code, you need to keep the Deploy checkbox active. After saving the preset, it will appear in the segment of website layers in the Novi builder.
Hence, you can easily create a set of custom panels by updating the default blocks with content and use them building a brand-new website quickly. However, if you will need to adjust the coding of HTML website or supplement its functionality by adding ready-to-use solutions from third-party developers, the design mode will bring you complete access to a site’s source code.
The advanced editor will help to manage the code right into the Novi builder. In case you have any additional questions on how to create HTML website step by step, feel free to contact our team via this link. Our team will gladly help you to build your HTML website and run it on the Internet.
Conclusion – Key Features of Novi Editor
To sum up, let’s review the key-feature of the HTML editor by Novi. All these features will help you to create a modern website without source file editing. Moreover, there is no additional software required. The large assortment of the inbuilt editor will help you to make all modifications using the Novi interface. The HTML creator is web-based. Thus, you will get the ability to edit your website from any location.
Secondly, the website builder interface allows you to move and edit all elements easily. It brings the ability to configure backend settings. For instance, you can set up a home page or configure SEO settings in one click. Additionally, the Novi builder brings full access to the source code. Thus, proficient web developers can modify any piece of the prebuilt designs building a custom project for a client.
Consequently, the HTML builder by Novi is a perfect solution for website building agencies and freelancers. The editor’s interface brings the opportunity to compose a site’s layout quickly. Then, you can fill it up with your content and update the source code if needed.

… [Trackback]
[…] Find More Informations here: novibuilder.com/blog/how-to-create-html-website/ […]